Request Management
The Request Management feature in GDX allows you to issue requests for information to suppliers. For example, a request to publish a declaration for a part that is not yet present in GDX, or a request to update an existing declaration. A Request can involve one or many parts.
You and your suppliers can track the status of requests, correspond to address questions, all from within the GDX application. When you issue a Request to one of your suppliers, they will receive an email notification as well as a notification on their GDX dashboard. When your supplier completes and publishes a part related to your request, it will be linked automatically.
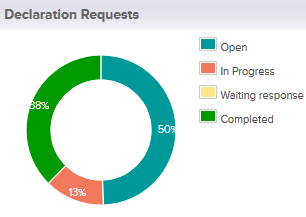
You can also view a chart on your dashboard that shows a summary status of all your requests.
Creating a Request
Creating a request involves identifying the parts to include in your request. This creates a request draft, which will be finalized as described in the next section.
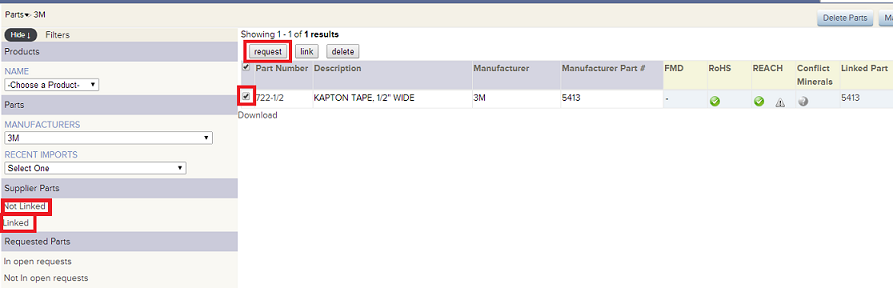
You will now identify which of parts to include in a request. For this example, we will choose all unlinked parts from one of the manufacturers.
- Select the manufacturer from the Manufacturers drop-down list.
- Click Not linked to filter view only unlinked parts from this manufacturer.
- Select the parts by clicking the checkboxes. You can select all the parts by checking the checkbox at the top of the column.
- Click request to add these parts to the request.
The request has now been created and is in the draft state. It has not yet been sent to your supplier.
Adding parts to a request in bulk
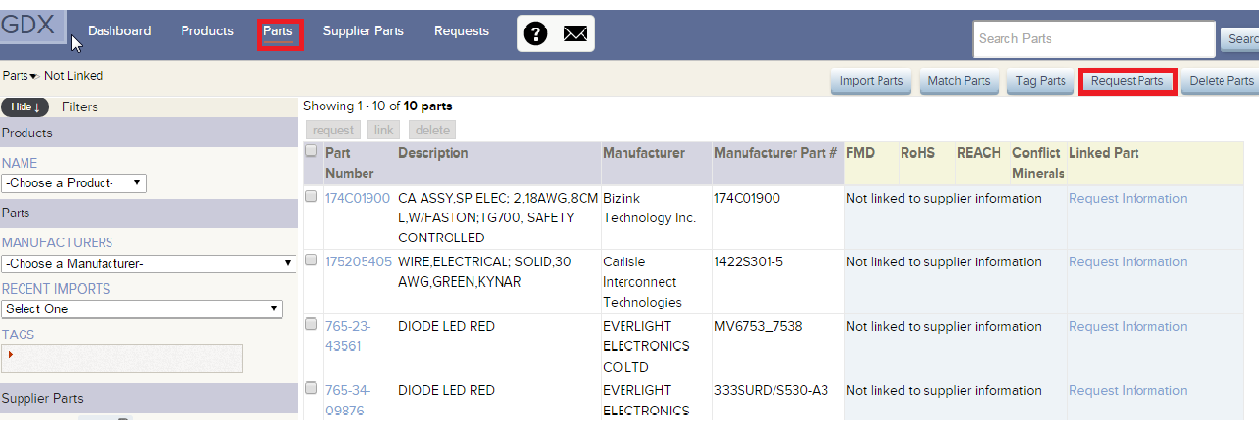
There is a Request Parts button on the Parts list page with which you should be able to add parts to a request in bulk.
1. Copy IPN, MFN and MPN from spreadsheet to add to the request

2. Once you click the Request Parts tab, a screen appears where you would need to paste the copied IPN, MFN and MPN
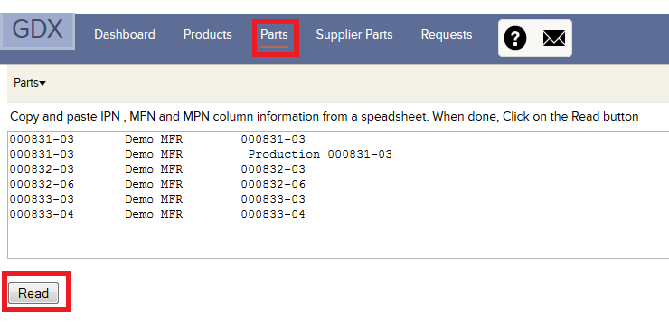
Click Read
3. A page then opens up listing the parts for which compliance declarations are to be requested
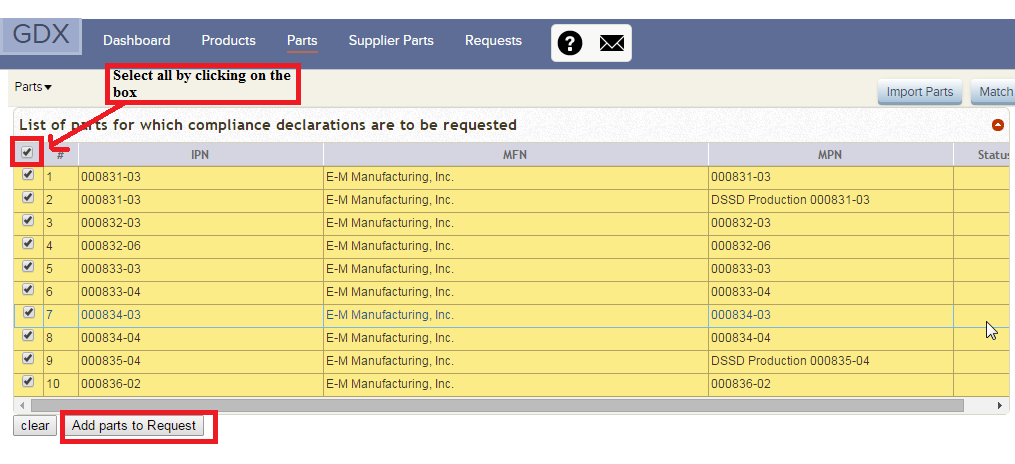
4. Click on Add parts to request
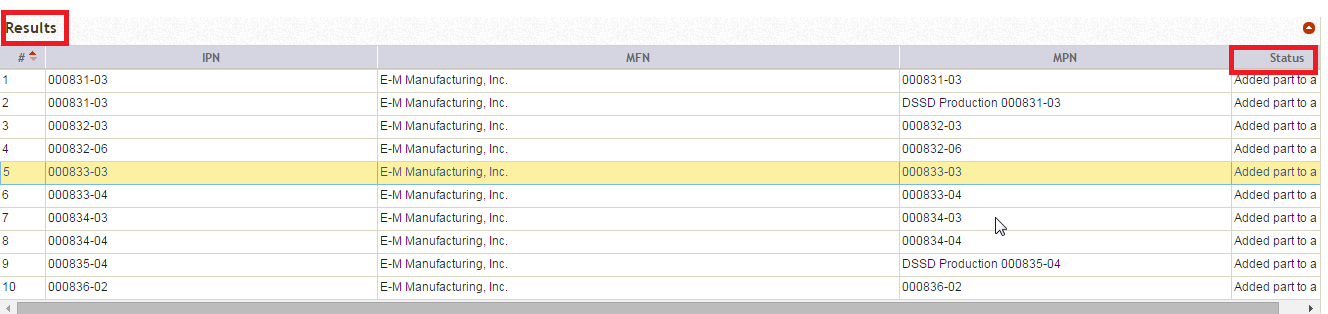
5. It then would show the Results page which provide the status on the parts imported for request whether Added part to Request or
Not Found
Finalizing the Request
h3.Request Description Settings
You can use this option to set a new default Request email. This replaces our default email text that we sent out with new requests.
You can also attach a cover letter/authorization document to the e-mail that goes out with all new requests.
- Manage Defaults – For all the users of the account.
- Manage My Defaults – For the current user
- Manage Email Message Templates – Can create the message template and attach documents that would be sent out with the requests.
Step 1
To finalize a request, you will indicate the information being requested, the date you want the request completed, and any specific comments and instructions.
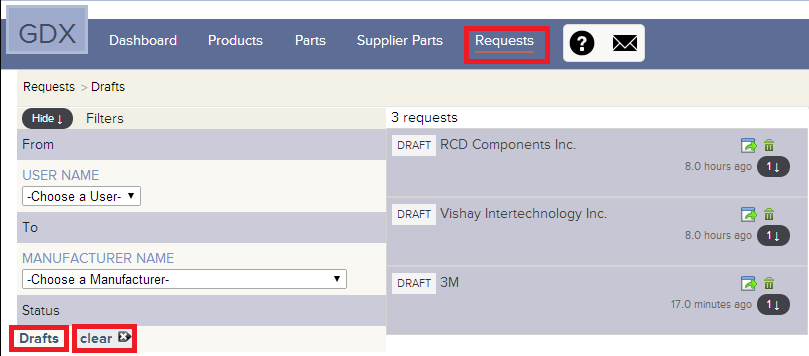
- Click Requests to go to the requests view:
- Click Drafts to view the request draft.
- Click
 to specify the supplier name. This is because the supplier name shown in your account can differ from the name of the supplier in GDX.
Step 2
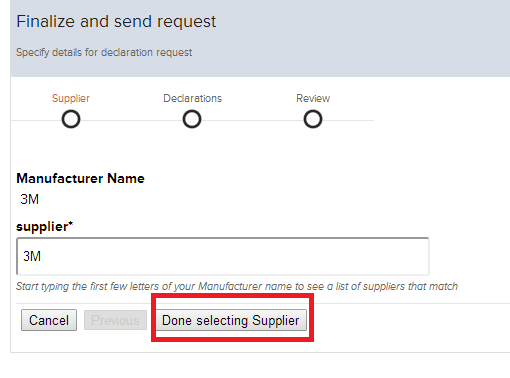
If you have made the association to this supplier previously, then it may already be set. If not, you can look up the name in GDX by entering the name in the supplier field. Select the supplier from the list, then click Done selecting Supplier.
Note that GDX will remember this association for future requests.
Step 3

Fulfillment Date: enter the date that indicates when you would like your request completed by the supplier.
Request Description: enter a description that is applicable to all parts in this request.
Select Declarations: check the items you want the supplier to provide. Indicate any optional comment for each.
Click Done with Declarations
Step 4
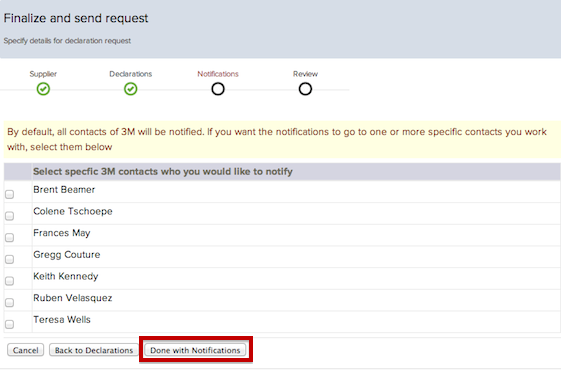
You can choose which contact you want the notification to go to. By default, all contacts of selected supplier will be notified.
Click Done with Notifications
Step 5
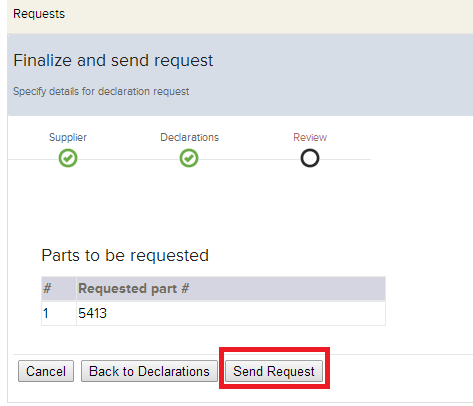
Your request is now ready to be sent. Review your information to ensure it is complete, then click Send Request to send the request to your supplier.
Viewing Requests
This section shows you how to view and filter your requests.
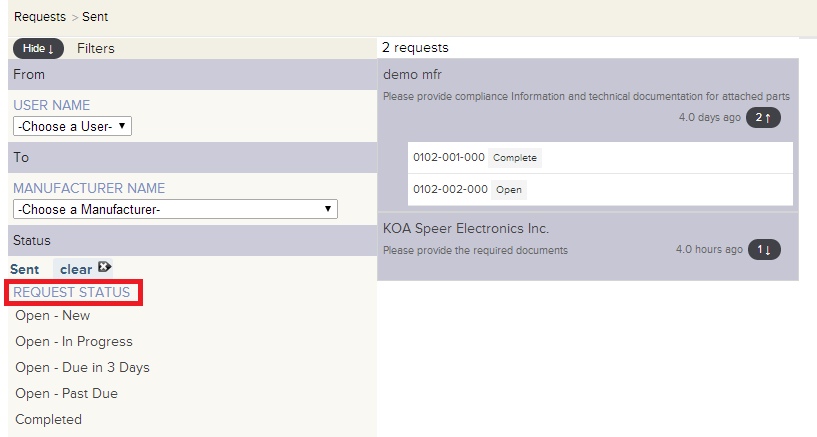
Click on Sent to view sent requests.
You can view your requests by status by selecting one of the items in Request Status field.
- Open-New: new requests that have not yet been acted upon.
- Open - In Progress: requests which have been partially addressed, but not fully completed.
- Open - Due in 3 Days: requests which are not completed and the requested date is within 3 days from now. Note that this does not include past due requests.
- Open - Past Due: requests which are not completed and the requested date has been missed.
- Completed: requests that have been completed.
Click on  to view the parts within the request and the status of each.
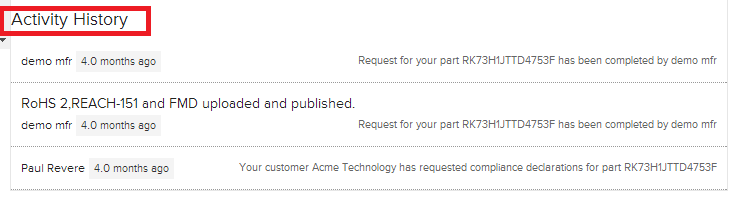
Also you can track requested part's progress by viewing Activity History. It will show you all the activities that relate to the part request, such as what exactly a supplier have done with the requested part, and the comments to the request from the supplier and you as well.