Material Disclosure
Step 1
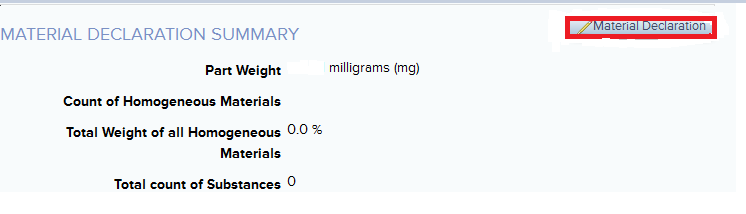
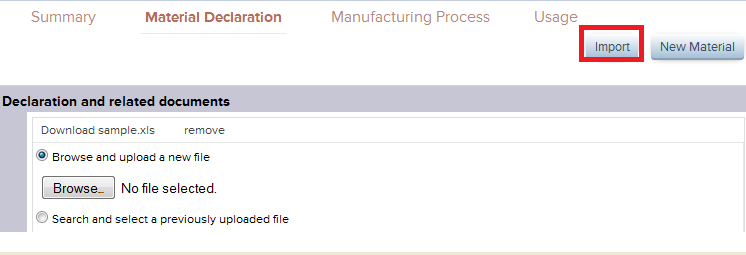
To create Material Declaration for a part, in the MATERIAL DECLARATION SUMMARY section, click Material Declaration tab.
Step 2
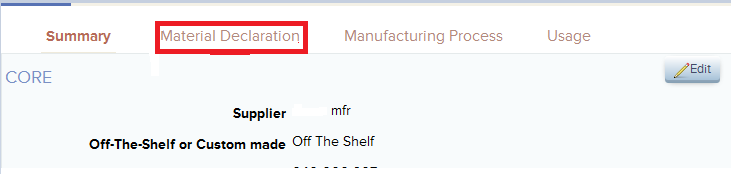
OR Click Material Declaration tab next to Summary
There are 2 methods to create material declaration in GDX- Manual creation of Full Material Declaration
- Importing material declaration using Spreadsheet
Creating Full Material Declaration in GDX
Declaration Document
Step 1
Attach the original Full Material Declaration file. This is typically a file with the table of materials and substances along with their weight.
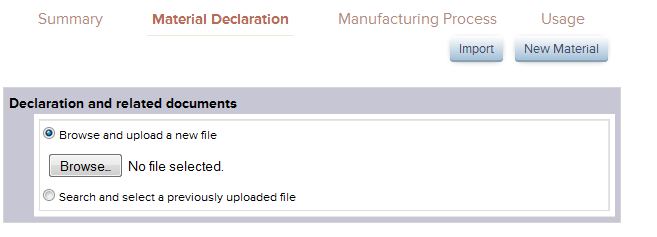
To use an existing Declaration document in GDX, choose Select existing declaration document. If the document is not uploaded to GDX, choose Browse and the file gets uploaded.
Step 2
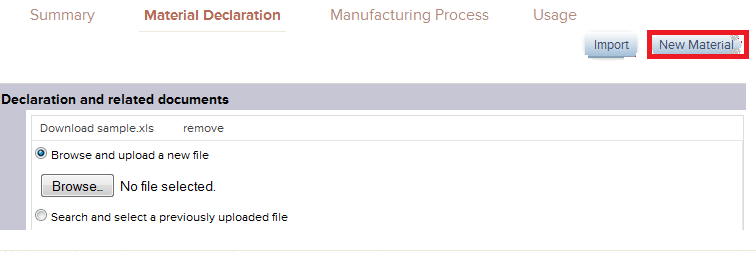
Click New Material on the top right of the page.
Step 3
The system then displays Configuration tab of the declaration the preferred method of material declaration entry can be specified.
If selected Absolute weight, choose the Unit of measurement and then click Next
Step 4

or when selected Percentage, below would be the options:
- Indicate the weight of the material and substances as absolute or percentage.
- To enter minimum and maximum weight values, choose Range weight values.
- Tolerance: to accommodate differences between the part/article, material, and sum of substance weights, set an appropriate tolerance. If set the tolerance to zero, then all the entries must tally exactly.
Click Next
Create Each Material
Step 1
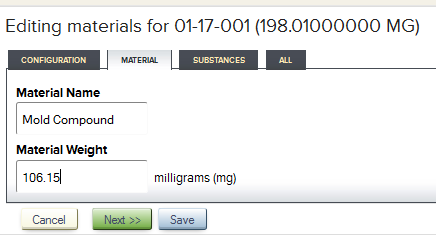
Enter the Material Name and Material Weight.
Click Substances tab.
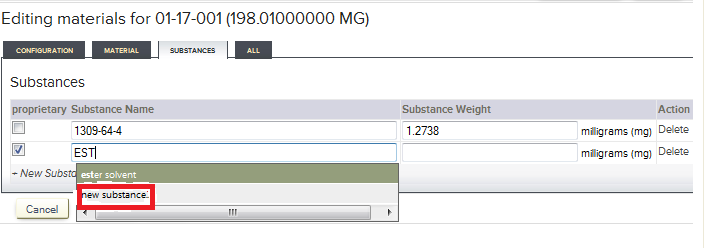
Step 2
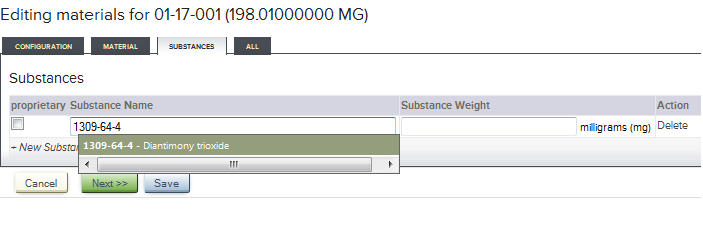
- Specify the CAS Number or substance name. The system displays a type-ahead list of available choices.
- Or, if the substance is proprietary, check the Proprietary box.
- To use one of the existing proprietary substance names, specify the name.
Step 3
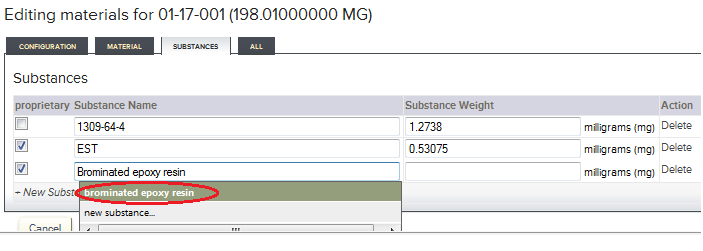
- To create a new proprietary substance name, select the new substance option from the adjoining drop-down list.
Avoid creating duplicate proprietary substances.
Step 4
- Enter the substance name in the box that appears in the screen and click Save
- Enter the substance weight.
Step 5
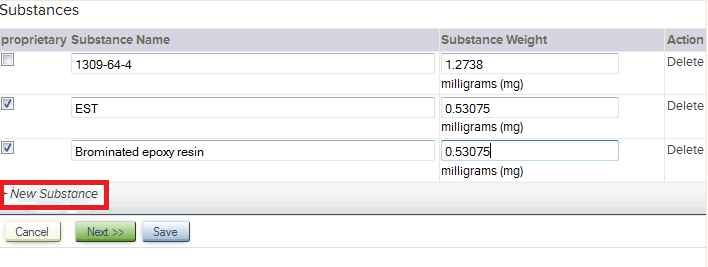
- Enter the next substance using the +New Substance link on the bottom of the table.
- Once all the substances are entered, click Save
Step 6
The material is now created.
Click New Material to enter each additional material and repeat the steps above.
Importing the Material Declaration from a Spreadsheet
GDX can import full material disclosure (FMD) data from a spreadsheet format material declaration, automatically creating the detailed FMD information in GDX.
Prepare the FMD Spreadsheet Template
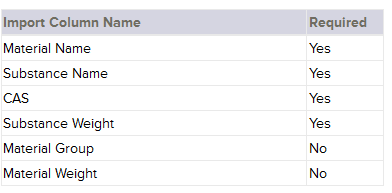
- Download the Material Declaration Sample Import Template and populate it with the available information.
- The file should be in Text format,which is done by selecting all the cells and choosing Format cells on a right click. Ensure it by pressing F2 key and Enter.
- The Material/Substance Names and weight should not have spaces before and after the names (make use of trim function of MS Excel)
- Then Save
- Weight unit of measure can be milligrams or grams. During Importing the screen will prompt to choose unit of measurement to apply.
- If the CAS number entry is not provided for a substance, the substance is considered proprietary.
- The import template does not support defining substance level exemptions. This should be added later, after import.
Import the FMD Spreadsheet Template
Step 1
- Go to the part for which the FMD data is to be imported.
- Click on the Material Declaration tab.
- Click on Import tab in the top right of the page.
Step 2
A page opens listing the criteria to Start the Import.
Step 3
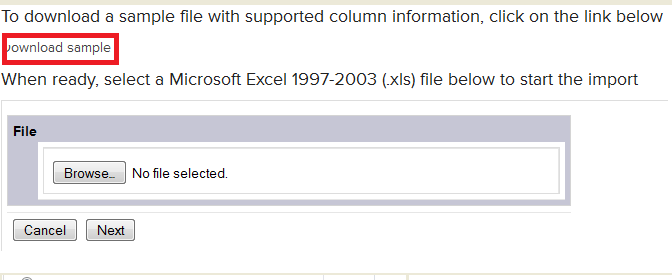
- Choose the file for import and click Next.
Identify column headers and rows in spreadsheet
Step 1
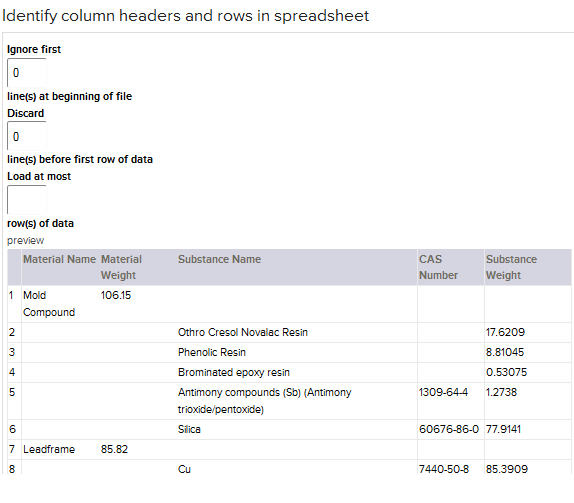
Ignore: is used to ignore rows that we don’t need to import
Discard: is used to indicate the number of lines to discard before the first row of data.
Load at most: is used to limit how many rows to import.
Clicking Preview provides an overview of the data that gets imported. Click Next.
Step 2
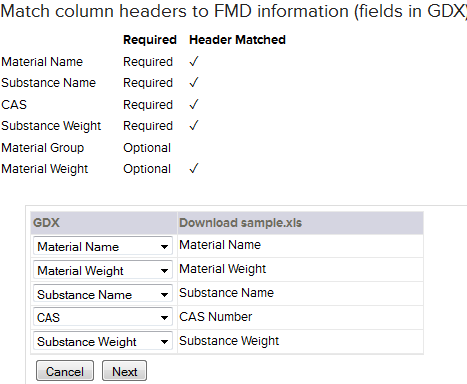
Map the column headers in the spreadsheet to the appropriate field names in GDX.
Click Next when complete.
Step 3
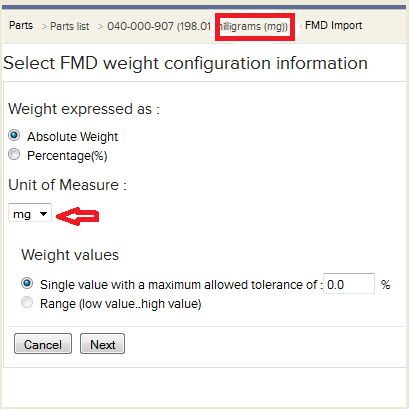
Enter Select FMD weight configuration information. Once complete, click Next
Weight Expressed as: Select the expressed weight as absolute or percentage as listed in the supporting material declaration document uploaded.
Unit of measure: Select the unit of measurement which would same as that selected in the Summary of the Part.
Weight values: To enter minimum and maximum weight values, choose Range, particularly if the weights is expressed in Percentage.
Tolerance: To accommodate differences between the part/article, material, and sum of substance weights, set an appropriate tolerance. If the tolerance is set to zero, all entries must tally exactly. You can set the tolerance value anywhere between 0 to 20%.
For a more accurate material declaration it always preferred to enter lower values in this field say starting from 0.001% and above.
Once a higher value is entered, the system would not let you to edit the field to populate a lower value.
This would call for Deleting the entire material declaration and recreating it.
Click Next
Step 4
The system displays Confirm part information to be imported screen.
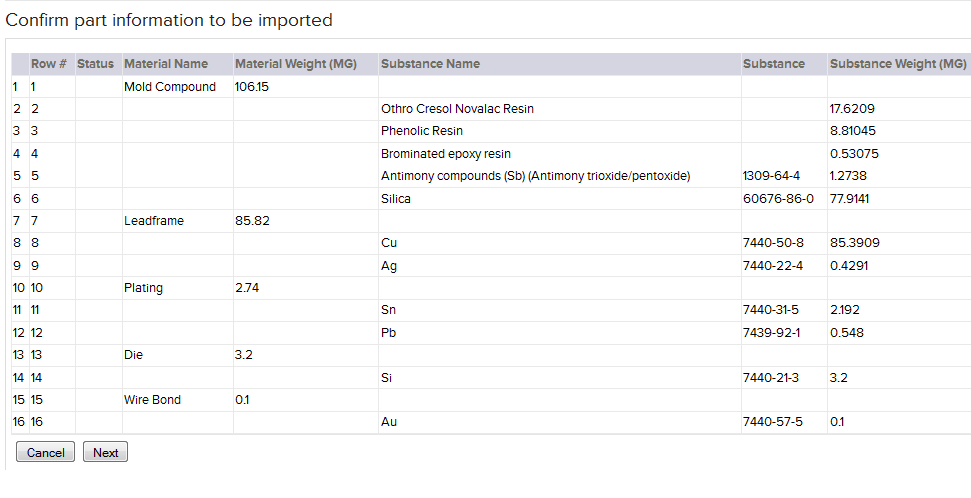
Click Next to complete the import.
Import Complete
The completed import is now displayed.
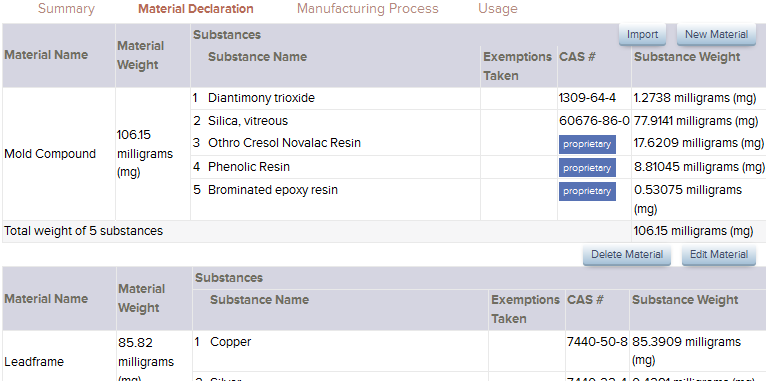
Declare exemptions taken
Step 1
If the RoHS status is Yes with exemptions for the part, this should be listed in the Material Declaration area as well, apart from the Compliance field.
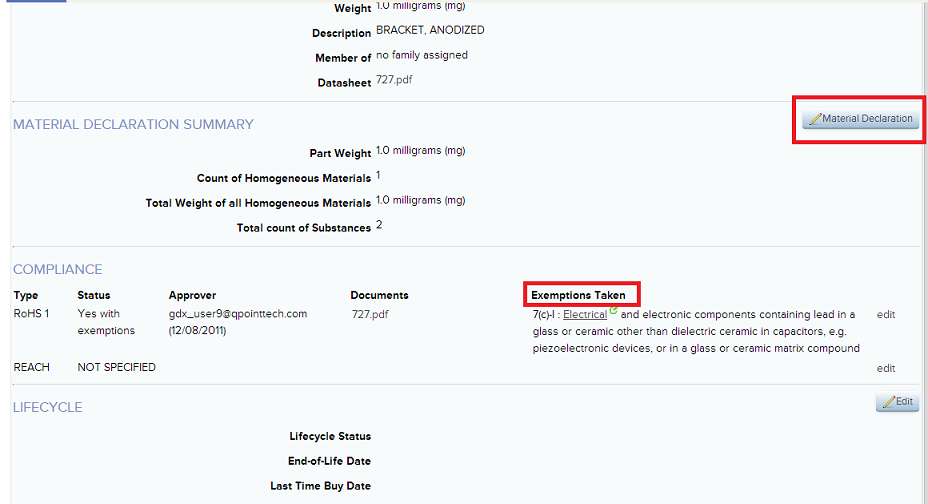
- Click on Material Declaration tab
Step 2

- Select the material which contains the exempted substance, and click on Edit Material
Step 3

- Click on the RoHS tab to choose the specific exemption for the exempted substance.
Step 4

- Click on Save and the screen shows the exemption taken for the substance.
Contact support at Technical Support if you need any assistance.